Weather Station 1
In this project, we will use a micro:bit to measure a number of useful things, starting with temperature.
A micro:bit can measure temperature all on its own - try it!
It’s not very accurate - it might have an error of 4C.
Can we do anything about that?
You can take the micro:bit anywhere to measure the temperature - but keep it dry!
We will read the measurements the next day, at about the same time. We could use them to plot a graph perhaps.
Our code will need a list to put the temperature readings in. We give it a name - templist.
A list is like a table:
Here is some code which saves the temperature to the list:

Enter both of these code blocks.
Now test your temperature readings over 1 day.
⚠You must keep the micro:bit switched on until you have finished reading out the data - otherwise your measurements will disappear!
⚠You must keep the micro:bit switched on all the time from when you start making the measurements (button A) until you have finished reading out the data (button B) - otherwise your measurements will disappear!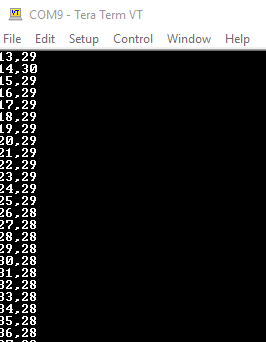
It’s not very accurate - it might have an error of 4C.
Can we do anything about that?
Make measurements over one day
Now we will write code to make temperature measurements, and save them every 15 minutes for a whole day.You can take the micro:bit anywhere to measure the temperature - but keep it dry!
We will read the measurements the next day, at about the same time. We could use them to plot a graph perhaps.
Our code will need a list to put the temperature readings in. We give it a name - templist.
A list is like a table:
| count | temperature |
| 0 | 21 |
| 1 | 21 |
| 2 | 22 |
| 95 | 25 |
Here is some code which saves the temperature to the list:
Let’s start coding!
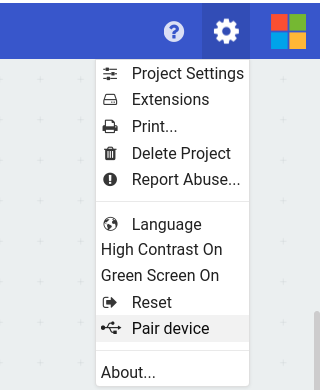
In your Chrome browser, open the MakeCode website (makecode.microbit.org) and pair the micro:bit by clicking on the gear wheel, then Pair device.Here is the code to make our measurements
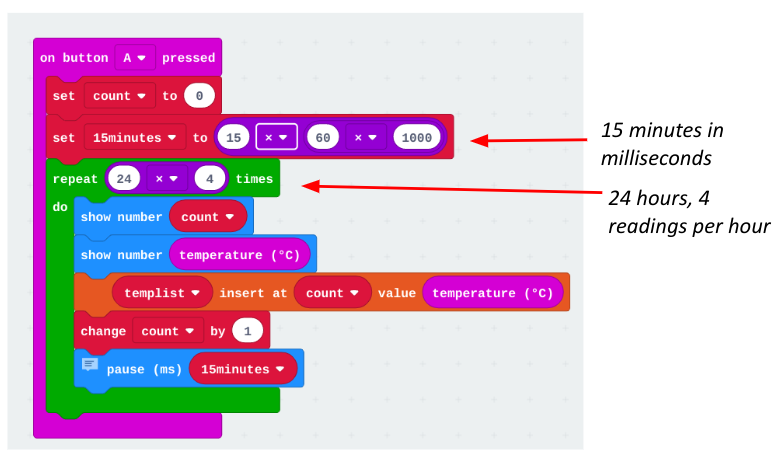
We are using a variable called 15 minutes - the micro:bit timer uses milliseconds (1 second/1000) rather than minutes, so we convert 15 minutes to 15 x 60 x 1000 milliseconds.
We make 4 measurements an hour, so we need to run our loop 24 x 4 times.
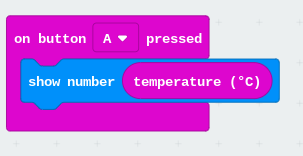
Code to read out our measurements
This will display the count number and temperature.

Enter both of these code blocks.
Testing your code
You can speed up your code while you are testing by changing this block. Now your 15-minute timer runs 60 times faster!⚠ Don’t forget to change back to 15 minutes and save it!

Now test your temperature readings over 1 day.
⚠You must keep the micro:bit switched on until you have finished reading out the data - otherwise your measurements will disappear!
- Start the measurements by pressing button A.
- The next day (at least 24 hours later), press button B to see the data.
Send your measurements to a computer (Windows)
You can save the data on a computer - to plot a chart for example.⚠You must keep the micro:bit switched on all the time from when you start making the measurements (button A) until you have finished reading out the data (button B) - otherwise your measurements will disappear!
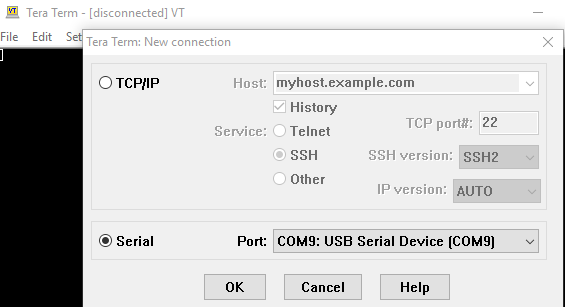
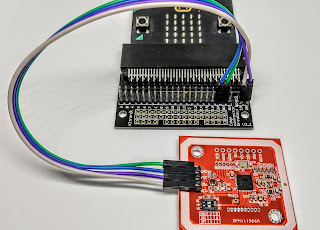
- You will need an app (Tera Term) on your Windows laptop.
- Connect your micro:bit to the laptop using a USB cable.
- Open Tera Term, then click Serial and choose the Port which says USB:
- Next,
- click OK then
- click on the Setup menu then
- select Serial, then
- Select 115200 under Speed
- Finally, click OK
You can save the data (using copy, then paste into a file) and convert it, using a spreadsheet, to a chart, like this:


Comments
Post a Comment